
How to Wipe a Computer's Hard Drive: The Complete Guide to Permanently Erasing Your Data
Whether you're selling your old laptop, donating a desktop to charity, or simply disposing of a computer that's reached the end of its life, there's one crucial step you absolutely cannot skip: wiping your hard drive. And I'm not talking about dragging files to the Recycle Bin and calling it a day — I mean completely, permanently, and securely erasing every trace of data from your storage device.
I learned this lesson the hard way years ago when a friend purchased a used laptop from an online marketplace. Within minutes of booting it up, he discovered the previous owner's tax documents, family photos, saved passwords, and even bank account information still accessible on the drive. The seller had simply "deleted" their files, thinking that was enough. It wasn't.
In this comprehensive guide, I'm going to walk you through everything you need to know about properly wiping a computer's hard drive. We'll cover the differences between HDDs and SSDs, explore both built-in operating system tools and third-party software, and ensure you understand which method is right for your specific situation. By the end of this article, you'll have the confidence to securely erase your data and protect your privacy.
Why Wiping Your Hard Drive Matters
Before we dive into the how-to, let's talk about why this matters so much. Your computer's hard drive is essentially a digital diary of your entire life. It contains:
- Personal documents, photos, and videos
- Saved passwords and login credentials
- Browser history and cached data
- Financial records and tax documents
- Email archives and private conversations
- Medical records and sensitive personal information
- Work files and proprietary business data
Even if you think you've deleted everything, the reality is that standard deletion methods don't actually remove data from your drive. They simply mark the space as "available" for new data to be written over it. Until that happens, the original files remain fully recoverable using widely available data recovery software.
Identity theft, corporate espionage, and privacy violations are all real risks when you dispose of a computer without properly wiping the drive. A study by the National Association for Information Destruction found that 40% of used electronic devices sold on secondary markets contained personally identifiable information. Don't become a statistic.
Understanding the Difference: Deleting vs. Formatting vs. Wiping
One of the biggest sources of confusion is understanding what different "erasure" methods actually do. Let me break this down:
Deleting Files
When you delete a file and empty the Recycle Bin (Windows) or Trash (Mac), you're only removing the pointer that tells your operating system where the file is located. The actual data remains on the drive until it's overwritten by new data. Recovery software can easily retrieve these "deleted" files.
Quick Formatting
A quick format is slightly better but still insufficient for security purposes. It essentially resets the file system and removes the directory structure, but the underlying data remains intact. Again, recovery tools can often retrieve files from a quick-formatted drive.
Full Formatting
A full format goes further by checking the drive for bad sectors and writing zeros to every sector. On traditional hard drives (HDDs), this provides a reasonable level of security for most personal use cases. However, it may not meet government or corporate security standards.
Secure Wiping (Data Sanitization)
This is the gold standard. Secure wiping uses specialized algorithms to overwrite every bit of data on your drive multiple times with random patterns. When done correctly, the original data becomes virtually impossible to recover, even with professional forensic tools.
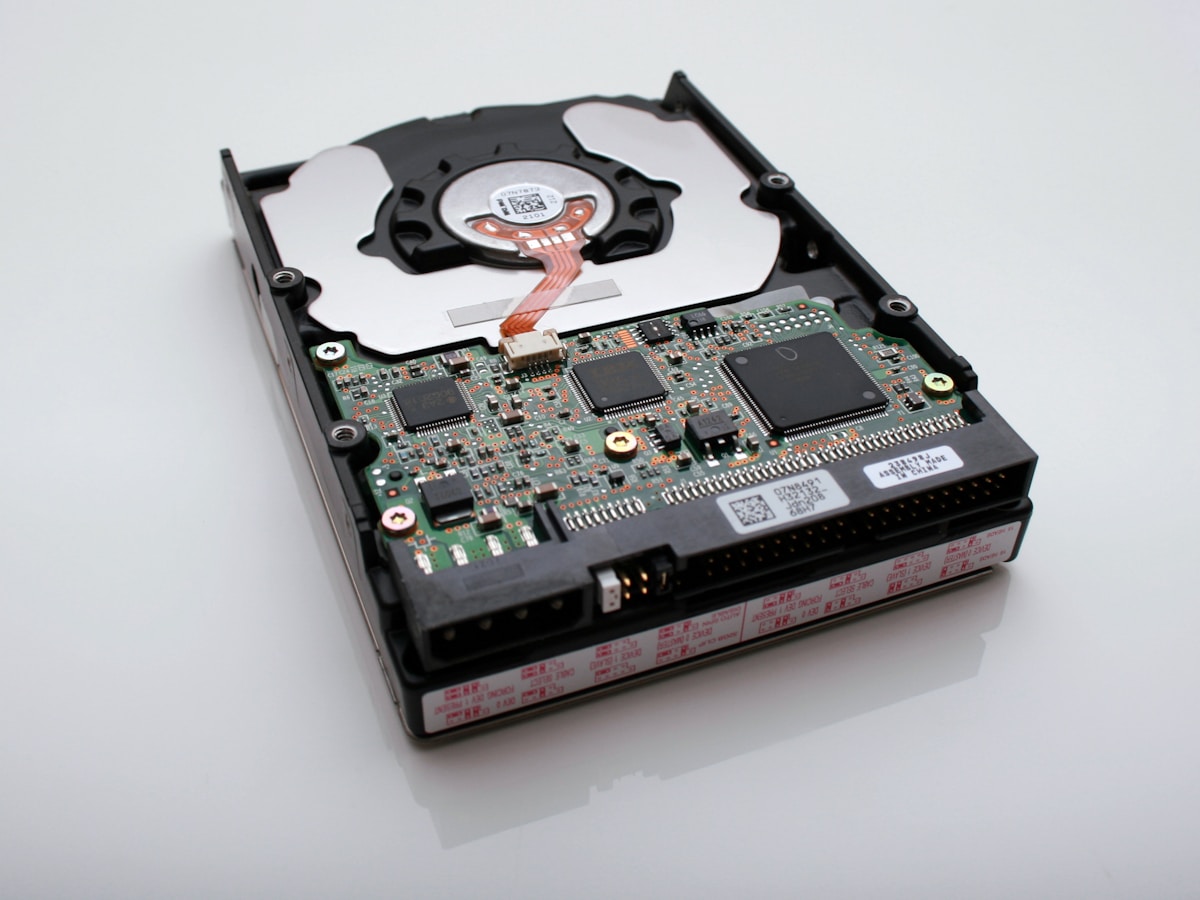
HDD vs. SSD: Why the Wiping Method Matters
Before you begin wiping your drive, you need to know what type of storage device you have. The method you use will differ significantly depending on whether you have a traditional hard disk drive (HDD) or a solid-state drive (SSD).
Hard Disk Drives (HDDs)
HDDs store data on spinning magnetic platters. When data is overwritten, the new data physically replaces the old data on the platter. This makes traditional overwriting methods highly effective for HDDs. Multiple-pass overwrites using tools like DBAN can make data recovery essentially impossible.
Solid-State Drives (SSDs)
SSDs are more complex. They use flash memory cells and employ a technology called "wear leveling" to distribute writes evenly across the drive. This means that when you "overwrite" data on an SSD, the drive might actually write the new data to a different physical location while keeping the old data intact in another area.
Because of this, traditional overwriting methods are not reliable for SSDs. Instead, you should use the manufacturer's secure erase tool or the ATA Secure Erase command, which tells the SSD controller to reset all memory cells to their factory state.
How to Check Your Drive Type
On Windows:
- Press Windows + R, type "dfrgui" and press Enter
- Look at the "Media type" column — it will show either "Hard disk drive" or "Solid state drive"
On Mac:
- Click the Apple menu and select "About This Mac"
- Click "System Report"
- Select "Storage" in the sidebar
- Look for "Medium Type" — it will show either "Rotational" (HDD) or "Solid State" (SSD)
How to Wipe a Hard Drive on Windows
Windows offers several methods to wipe your hard drive, ranging from built-in tools to third-party software. Let's explore your options:
Method 1: Windows Reset with Data Wiping (Windows 10/11)
This is the easiest method if your computer is still functional and you want to wipe the main system drive.
- Go to Settings → System → Recovery
- Click Reset PC
- Select Remove everything
- Choose Local reinstall or Cloud download
- Click Change settings
- Toggle Clean data to Yes (this is the crucial step)
- Confirm and begin the process
The "Clean data" option performs a more thorough wipe that makes file recovery significantly more difficult. This process can take several hours depending on your drive size.
Method 2: Using Command Prompt (For Secondary Drives)
If you want to wipe a secondary drive (not your Windows installation drive), you can use the built-in diskpart and format commands:
- Open Command Prompt as Administrator
- Type diskpart and press Enter
- Type list disk to see all drives
- Type select disk X (replace X with your drive number)
- Type clean all (this writes zeros to every sector)
- Wait for the process to complete
Warning: Be absolutely certain you've selected the correct disk. This process is irreversible and will destroy all data on the selected drive.
Method 3: DBAN (Darik's Boot and Nuke) for HDDs
DBAN is a free, open-source tool that's been the go-to choice for secure drive wiping for decades. It boots from a USB drive and can wipe any HDD in your computer, including the system drive.
- Download DBAN from the official website
- Create a bootable USB drive using Rufus or similar software
- Boot your computer from the USB drive
- Select the drive(s) you want to wipe
- Choose a wiping method (DoD 5220.22-M is commonly used)
- Start the wipe and wait for completion
Note: DBAN is not recommended for SSDs due to the wear leveling issues mentioned earlier.
How to Wipe a Hard Drive on Mac
Apple provides built-in tools that make wiping your Mac's drive relatively straightforward, though the process differs depending on whether you have an Intel Mac or an Apple Silicon Mac.
For Apple Silicon Macs (M1, M2, M3, etc.)
- Shut down your Mac
- Press and hold the power button until you see "Loading startup options"
- Select Options and click Continue
- Open Disk Utility from the Utilities menu
- Select your startup disk (usually "Macintosh HD")
- Click Erase
- Choose APFS format and give the drive a name
- Click Erase Volume Group
After erasing, you can either reinstall macOS for the new owner or leave it ready for setup.
For Intel Macs with T2 Security Chip
The T2 chip encrypts all data on the drive by default. When you erase the drive, you're essentially destroying the encryption key, making the data unrecoverable. The process is the same as above, but you'll access Recovery Mode by holding Command + R during startup.
For Older Intel Macs (Without T2 Chip)
Older Macs have an additional "Security Options" feature in Disk Utility:
- Boot into Recovery Mode (Command + R at startup)
- Open Disk Utility
- Select your drive and click Erase
- Click Security Options
- Move the slider to determine the number of passes (more passes = more secure)
- Click OK and then Erase
The highest security option overwrites the data seven times, meeting Department of Defense standards.
How to Securely Wipe an SSD
As I mentioned earlier, SSDs require special treatment. Here are the recommended methods:
Method 1: Manufacturer's Secure Erase Tool
Most SSD manufacturers provide free software that includes a secure erase function:
- Samsung: Samsung Magician
- Crucial: Crucial Storage Executive
- Western Digital: WD Dashboard
- Kingston: Kingston SSD Manager
- Intel: Intel Memory and Storage Tool
Download the appropriate tool for your SSD, install it, and follow the secure erase instructions. This is the most reliable method as it uses the drive's built-in sanitization commands.
Method 2: Parted Magic (Paid)
Parted Magic is a bootable Linux distribution that includes proper ATA Secure Erase support for SSDs. While it's no longer free ($13), it's one of the most reliable tools for securely erasing SSDs from any manufacturer.
Method 3: Using Encryption
An alternative approach that works for both HDDs and SSDs:
- Enable full-disk encryption (BitLocker on Windows, FileVault on Mac)
- Let the encryption complete
- Perform a standard format or reset
- The encryption key is destroyed, making all data unreadable
This method is particularly effective for SSDs because even if some data remains in wear-leveled areas, it's encrypted and inaccessible without the key.
Third-Party Wiping Tools Comparison
| Tool | Price | HDD Support | SSD Support | Bootable | Best For |
|---|---|---|---|---|---|
| DBAN | Free | Excellent | Not Recommended | Yes | Home users with HDDs |
| Parted Magic | $13 | Excellent | Excellent | Yes | All drive types |
| Eraser | Free | Excellent | Limited | No | Wiping specific files |
| nwipe | Free | Excellent | Not Recommended | Yes (via ShredOS) | DBAN alternative |
| Blancco Drive Eraser | Commercial | Excellent | Excellent | Yes | Enterprise/Compliance |
| Manufacturer Tools | Free | Brand Specific | Excellent | Some | SSD secure erase |
Physical Destruction: The Ultimate Solution
For extremely sensitive data or drives that are already failing, physical destruction may be the most appropriate option. Here's what you should know:
For HDDs:
- Degaussing: Uses a powerful magnetic field to scramble the data on the platters
- Shredding: Industrial shredders can completely destroy hard drives
- Drilling: Multiple holes through the platters can prevent data recovery
- Disassembly and Sanding: Removing and physically damaging the platters
For SSDs:
- Shredding: The most reliable method for physical SSD destruction
- Incineration: High temperatures will destroy flash memory chips
- Crushing: Must damage the individual memory chips, not just the case
Many communities offer e-waste recycling events where you can have drives professionally destroyed. Some office supply stores and electronic retailers also offer this service.

Recommendations Based on Your Situation
With all these options, which should you choose? Here are my recommendations based on common scenarios:
Selling or Donating Your Computer
For Windows with HDD: Use Windows Reset with "Clean data" enabled, or use DBAN for extra security.
For Windows with SSD: Use the manufacturer's secure erase tool, then perform a Windows Reset.
For Mac: Use Disk Utility's Erase function in Recovery Mode. For older Macs without T2 chips, enable Security Options.
Disposing of a Broken Computer
If the computer doesn't boot, remove the drive and either:
- Connect it to another computer using a USB adapter and wipe it there
- Physically destroy the drive
- Take it to a professional e-waste recycling facility
Handling Highly Sensitive Data
For business, legal, or compliance requirements:
- Use commercial-grade tools like Blancco that provide certificates of destruction
- Consider physical destruction combined with software wiping
- Document your destruction process for audit purposes
Quick Turnaround Needed
If you need to wipe a drive quickly:
- Use the encryption method — encrypt the drive fully, then format
- For SSDs, manufacturer secure erase is usually fast
- Accept that quick methods may be less thorough
Common Mistakes to Avoid
Before you start wiping your drive, be aware of these common pitfalls:
- Forgetting to back up: Make absolutely sure you've saved everything you need before wiping
- Wiping the wrong drive: Double-check which drive you've selected, especially when using command-line tools
- Using the wrong method for SSDs: Traditional overwriting tools aren't effective on solid-state drives
- Interrupting the process: A partially wiped drive may still contain recoverable data
- Forgetting cloud accounts: Sign out of iCloud, Google, Microsoft, and other accounts before wiping
- Ignoring external drives: Don't forget to wipe USB drives, external hard drives, and SD cards too
Frequently Asked Questions
How long does it take to wipe a hard drive?
The time required depends on the drive size, type, and wiping method. A quick format takes only seconds, while a single-pass zero-fill on a 1TB HDD can take 2-4 hours. Multi-pass methods like DoD 5220.22-M can take 6-12 hours or more for large drives. SSD secure erase using manufacturer tools is typically much faster — often just a few minutes — because it uses built-in commands rather than overwriting every sector.
Is one pass of overwriting enough to prevent data recovery?
For most practical purposes, yes. Modern research has shown that a single complete overwrite makes data recovery extremely difficult, even with advanced forensic tools. The idea that multiple passes are necessary comes from older studies on legacy drive technology. However, if you're handling highly sensitive data or need to meet specific compliance requirements, multi-pass methods may still be mandated by policy.
Can data be recovered after a factory reset?
It depends on the device and the type of reset. A basic factory reset on many devices only removes user data and reinstalls the operating system without securely erasing the underlying storage. This means data can often be recovered with specialized software. To prevent this, use secure erase options when available, or encrypt your device before performing the reset.
Do I need to wipe my SSD if it's encrypted?
If your SSD uses hardware encryption (like self-encrypting drives or Apple's T2/M-series chips), erasing the encryption key effectively makes all data unrecoverable. However, it's still good practice to use the manufacturer's secure erase function to reset the drive to a known clean state. This also ensures the drive performs optimally for its next user.
What's the difference between DBAN and nwipe?
DBAN (Darik's Boot and Nuke) is no longer actively maintained and was last updated in 2015. nwipe is a modern fork/continuation of the DBAN project that's actively developed and included in the ShredOS bootable environment. Both perform the same core function — securely wiping HDDs — but nwipe receives regular updates and bug fixes. For new projects, I recommend using ShredOS with nwipe instead of DBAN.
Can I wipe my hard drive without a disc or USB?
Yes, if you're wiping a secondary drive (not your system drive), you can use built-in tools or software that runs from within your operating system. For wiping your primary system drive, Windows 10/11's Reset feature with "Clean data" enabled doesn't require external media. However, for the most secure wipe of a system drive, bootable tools are recommended since the operating system won't be running and protecting its own files.
Is it safe to sell a computer after using Windows Reset?
Using Windows Reset with the "Clean data" option enabled provides reasonable security for most personal use cases. It makes casual data recovery very difficult. However, if your computer contained highly sensitive information (financial data, business secrets, medical records), you should consider additional measures like using DBAN for HDDs or manufacturer secure erase for SSDs before the reset.
Conclusion
Wiping your computer's hard drive is a critical step that protects your privacy and prevents your personal data from falling into the wrong hands. While it might seem complicated at first, the process becomes straightforward once you understand your options.
To summarize the key points:
- Identify your drive type (HDD or SSD) before choosing a wiping method
- Use appropriate tools — traditional overwriting for HDDs, manufacturer secure erase for SSDs
- Back up important data before starting the wiping process
- Consider encryption as an additional layer of security, especially for SSDs
- Physical destruction remains an option for extremely sensitive data
Taking the time to properly wipe your hard drive is one of the most important things you can do to protect yourself in our digital age. Whether you're upgrading to a new computer, donating an old one, or responsibly recycling electronic waste, you now have the knowledge to ensure your personal data stays personal.
Don't let laziness or uncertainty put your privacy at risk. A few hours of effort now can prevent a lifetime of headaches from identity theft or data breaches. Your future self will thank you.
Disclosure: This article is provided for informational and educational purposes only. The author has no affiliation with any of the software or hardware manufacturers mentioned. Always back up your important data before wiping any storage device, as the process is irreversible. The effectiveness of data destruction methods may vary, and no method can guarantee 100% data irrecoverability. For highly sensitive or regulated data, consult with a professional data destruction service. The author and publisher assume no responsibility for any data loss or other consequences resulting from following the procedures described in this article.